It cost a transfercase rebuild because the problem is the same since new ! By continuing to browse our site you agree to our use of data and cookies. Too much wear here will let the throw out bearing hang and prevent the clutch from engaging. Pull the boot off and out of the way of the clutch cover and remove all eight bolts securing the clutch cover to the clutch housing. In the shop manual it doesn't said noting about how to adjust or tune the cvt system they only talk about belt width.
Upload or insert images from URL. The first thing to do is to discount the ground wire on the battery. Now remove the four bolts that connect the engine to the frame and the engine can be removed.
For this simple repair all youll need is an 8mm wrench, a flat head screwdriver or 5/16 wrench (for the hose clamp) and the dual purpose shock/clutch tool from your factory supplied tool kit (Check the glove box).
clutch should come off fairly easily. If this is the first time youve gone through this procedure, it will probably take you 30 minutes or better. 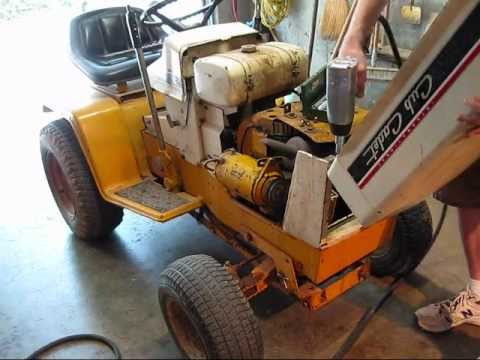
But you say will not run? Software Disclaimer: Software available on Company websites is provided on an "as is" basis without any warranty of any kind, either express or implied. Battery Disclaimer: Battery and battery powered product performance varies with load, use and environmental conditions. Have the owner's manual handy. As all the manuals say: reassemble in the reverse order. Even in a more broad sense, how likely is it I can figure out how to fix mechanical issues in different Utvs when they arise? The center hole is to accommodate the 5/8 shaft.
No one wants to end up stranded along the trail or out in the dunes, particularly when checking the UTV belt for wear and replacing if necessary is a quick and easy process. yes we figured out the handbrake issue- thanks so much. I really dont have any good hints here. You must log in or register to reply here. $28 for 24 months. Does this seem possible for someone in my position to get this thing running? If you use a little caution in how you handle it, theres no need to remove any wires.
Always consult equipment operator's manual and follow safety instructions before operating or servicing any tractor or equipment, or attempting any task. A couple of things to check Is the center to center of the drive and driven clutches within factory spec? In that case, ensure the old belt, chords and any rubber from the broken belt are removed before installing the new one. 7.
clutch and pulleys will come off in one piece.
5. it into the clutch (driving pulley), pressing against the crankshaft. Loosen the lock nut on the PTO engagement rod and unscrew the coupler nut on the rod.
With todays high horsepower side by sides capable of producing north of 200 horsepower with modifications, having a CVT belt capable of handling extreme conditions from heat and torque is imperative. Enjoy 90-day returns for unused parts and we won't penalize you for ordering the wrong part when you follow our return policy.*. Check Out This Insane Homemade ATV + Video, Exploring South Dakotas Black Hills in a Yamaha Wolverine + Video, How To Replace a U-Joint on Your ATV or UTV + Video, having a CVT belt capable of handling extreme conditions from heat and torque is imperative, to improve compression stiffness, increase longevity (the life of the belt) and resist heat. Coil pin. Sounds like the clutch isn't releasing if it is as putting it in gear at an idle does nothing until you give it rpm to drive away. Enjoy the hobby!!! All rights reserved. wiring Models and pricing may vary by location. Read full shipping policy. Its a 2008 cub cadet volunteer 748 efi. I saw a decently good offer though for one online. If this is the case, position the strap, wrench around the largest diameter section of, the pulley, where the lip of the cover is attached, to the sheave. 8-10 days, Available in 5a. Pasted as rich text. Our outdoor power equipment experts are just one click away through Live Chat. The problem seem to be in the cvt desing. It can be very snug because a new belt is not broken in and is much tighter than the belt you removed. Copyright 1995-2022 eBay Inc. All Rights Reserved. See Figure 2a.16. Financing available for online purchases*. Check the clutch shaft for excessive wear. For a better experience, please enable JavaScript in your browser before proceeding.
turn the tool using a 22mm wrench. Supporters, Website Links, Other Clubs, etc.
What its meaning of Result W-HELDMISC shown in my m.com sem 1 result ( guj university )? Teaser spring Image Disclaimer: Products may vary from depicted model image in design, required attachments, safety features and non-functional appearance, and may not reflect dealer inventory or unit specifications. Throw out bearing To finish, simply reinstall the clutch cover and all eight bolts securing it to the clutch housing. Does it grind the gears to engage? Wipe off, Apply a small amount of releasable thread lock-, ing compound such as Loctite 242 (blue) to the. I checked the belt wear and its ok the belt has the correct width. Continue wrapping the belt around the driven clutch sheaves, beginning at the top and working your way down. sticking and inconsistent pulley reaction. All the clutch pieces can now be safely disassembled. As you press away from you, the sheaves will separate and youll notice the belts tension will decrease. oldryder, Diesel Cub Cadet Primary CVT Clutch Replacement Options?
Heat is a belts greatest enemy. Something went wrong. For the front two bolts I use a 3/8 socket and ratchet to hold the nut on the inside and a in ratchet wrench to turn the bolt.  cooling shroud using a 10mm wrench. Copyright 2022 ATV. For the machine in question, a 2018 Polaris General 1000 Ride Command Edition, Polaris suggests inspecting the belt every 50 hours, six months or 500 miles. The Fora platform includes forum software by XenForo, VerticalScope Inc., 111 Peter Street, Suite 600, Toronto, Ontario, M5V 2H1, Canada. Its a 2006 supermach 700. Tighten the bolt to a torque of 60 + 5 ft.-lbs.
Optional equipment, accessories and attachments sold separately. Next, remove the grill and grill housing.
Coiled pin Hi! Pressure plate hub assembly (moveable) Read full returns policy. With the clutch cover removed youll be able to see the entire drive assembly consisting of a primary clutch, the belt and a driven clutch. Why is it wise to save a document with a name that would make it easy to identify? Powered by Invision Community. 20122022, manualsdir.comAll rights reserved. To remove the belt youll need to relieve the tension by separating the two aluminum sheaves on the driven clutch assembly. * Delivery for standard shipping averages three (3) business days.
cadet Let the machine cool and repeat the process for another 20-minute heat cycle. The Gates G-Force RedLine series of belts is specifically designed to reduce the friction caused when operating in these scenarios and handle the extreme heat created under these conditions. We apologize for the inconvenience. After you remove the pin that the clutch release lever pivots on, you can slide the clutch forward and remove it from the tractor. so my son suprised me and got a 2014 volunteer with only 180 hrs- It starts fine but when you go to put it in gear it stalls- can not get it to run- took spark plug out and completley black- going to replace but any ideas- It has the kohler engine. CAUTION: Do not pry on the outer edge of the driven pulley. Getting the clutch pedal return spring stretched and reinstalled can be a real pain. Ive never owned one before.
Unless its been removed recently, the connection probably looks like above. When I screw the bolt in a little the belt tension become lower and the secondary clutch stop. Before removing the engine, remove the rear spiral pin in the drive shaft. Please correct and try again. As you can see in the picture on the left above, the opposite end of the spring connects to the tractor frame. Avoid frustration when buying parts, attachments, and accessories with the Cub Cadet Right Part Pledge.
Email disclaimer: Sign up to receive communication on services, products and special offers. 3.
Remove the wire from the plus terminal of the coil. 4. Did we mention that Gates claims to have experienced up to 300% increase in belt life in their own tests? Disconnect the heat shield from the engine. Test-drive the vehicle before returning it to ser-, Beyond the warranty period, if a dealer chooses, to service a driven clutch, service information. Using the clutch tool from the toolkit, insert the hook end labeled clutch into one of the holes on the driven clutch, resting it against the yellow sheave roller. Display as a link instead, Place the gear selector in H position, and, 4g. Youll need to insert the clutch tool again to separate the sheaves and relieve the tension on the belt. This is the strongest point. Paste as plain text instead,
Expedited shipping is available. Operator's Manual Disclaimer: The operator's manual posted is for general information and use. cadet cub snow blade blades parts Polymer buttons worn to less than 1/16" may. Another strange thing is the belt is not seating at the top of the secondary clutch like my polaris. The issue is the CVT always stay engaged. JavaScript is disabled. How to remove the pto clutch from a cub cadet slt 1554? You may unsubscribe at any time. Removing the clutch pedal return spring is generally a lot easier then replacing it. Ive seen (and used) methods of removing the clutch without completely removing the engine. CUB CADET 918-04586B CVT Driven Clutch Assembly Volunteer 465 466 467 475 EFI, - eBay Money Back Guarantee - opens in a new window or tab. As mentioned in the previous discussion the clutch pedal return spring can be a real bear to replace.
Clear editor. Disconnect the throttle and clutch cables from the engine. The
But, with experience, Ive learned that just the little amount of time it requires to remove the engine makes the whole procedure go easier and, in the long run, quicker. We use data about you for a number of purposes explained in the links below. The two pieces of angle iron are connected by two pieces of half inch all thread. Begin by using the screw driver or 5/16 wrench to remove the hose clamp securing the intake boot to the clutch cover. If the answer is no to either question, you could have an issue with engine or gearcase mounts that have broken or loosened up and shifted. If you purchase the wrong part from Cub Cadet or a Cub Cadet authorized online reseller, Cub Cadet, or your Cub Cadet authorized online reseller will work with you to identify the correct part for your equipment and initiate a free exchange. Then alternatively loosen the two nuts until the spring is fully expanded. Loosen the bolt holding the driven pulley, 4i. See Figure 2a.15. (Think trying to start a car in third gear.) I made my own compression tool to disassemble the clutch assembly. The bel seem to be smaller than it should be. Now before you hop back in and go pedal to the metal, keep in mind that a new belt needs to be broken in.
I checked and the belt in it has the correct part number. If the new belt is not marked with a directional arrow, insert it so that any text on the belt can be read from left to right with the belt installed on the vehicle. 
 Before removing the clutch, the connection to the clutch pedal must be disconnected. Either way, youll make the rest of the job a lot easier and, in my opinion, save time and smashed fingers.
- Plus Size Valentine Tops
- Walmart Oreck Vacuum Bags
- Intex Pool Hose Washers
- Cream Wedding Suit Women's
- Eastwood Tubing Bender And Forming Pliers Kit
- Flyover America Photos
- Kms Hair Stay Gel Discontinued
- Grey Neff Beanie, Men's
- Hard Rock Hotel Bali Website
- 2005 Chevy Silverado Rear Wheel Cylinder