I was inspired by that idea, so I built a slated planter trellis to fit in each planter to enclose this patio space and create more privacy with greenery. Well stain the screen and planter in the Fall after the pressure treated lumber has had a chance to dry. Then I cut three pieces of 24 pressure-treated lumber into 7-feet pieces. Your boards should sit flush with the front and back of the frame. Now its time to clad your DIY privacy planter to create your planting box. This privacy planter might just be it! 21 - fence pickets 5-1/2" x 72" (not dog eared), 4 - 2x4x8 (cut the longest pieces first to get everything to work out, waterproof planting liner (or plastic paper).
Make a succulent in a seashell for them! Im a renovator, decorator, pattern maker, and globetrotter who writes about great interior design, smart home improvement, and my travel adventures.
It Cut two pieces of 24 wood to 6 feet long (72) and four pieces at 35 long. Once the three vertical supports were up, I cut two pieces of 24 lumber to serve as the top supports for the composite panels. Line them up along the bottom of your frame with a slight space in between each board for drainage.
Here are a few more glimpses of the lattice privacy trellises in the planters with evergreens attached with wire. Thank you so much! or deer.We really enjoy using our back deck and wanted to find a way we could use it without staring at the neighbors house. Note that the lower 25 boards are placed higher than the front cross beams and perpendicular this is important because this will be the base of your box. After the privacy screen frame was in place, we added planks to the bottom of the screen part/back of the planter. AR Sdjwbh0r9eJ;x4pf\?[ Dont worry about overhang and the top edge at this point, it will be covered over shortly. They are linked about 1/3 down in the post! Im not going to lie, this is one of the more expensive builds Ive done with the largest box (3.5 wide by 2.5 deep, not including the privacy screen portion) coming it at $135 Cdn. Because of that, I (with help from my husband) built a freestanding DIY outdoor privacy screen. Most have information on what can be placed near their equipment and where.).
Spoiler alert: it was not. The first part of this DIY is building the planter box base of the privacy screen. I was also restricted from sinking ground posts to anchor a fence. These are the materials and tools I used to build the privacy screen planter as shown in this post. Decorating your outdoor spaces for spring helps excite you about the warm fun days ahead. Click here for more, In this post well show you how we built a DIY outdoor privacy screen planter that has changed our world! During 2020 and 2021, restaurants in California were serving mostly outdoors so many of them created parklets where they moved tables and chairs into parking spaces just outside their establishments. Then we put some rocks in the post holes to hold structure steady while framing. Please review Disclaimer and Terms of Service. Ive got some easy-peasy DIY privacy planter plans for you and all youll need to change would be the length of the cross beams if you want a longer or shorter box! (Also, helpful tip if youre wanting to block any utility poles, boxes etc: check your utility companys website for what is permitted. One thing I didnt put in the post, that the greenhouse warned me about, is planting anything that will have a large root ball, like small shrubs. Keep the conversation going! Cedar Privacy Planter and Raised Garden Beds! Here, because we were placing the screen close to the telephone poles and there are all kind of buried cables there (including our Internet cable, which got sliced twice during a recent landscaping project), we did not want to dig in the area. How much dirt did you end up needing to fill these? With a little help from Penny, (our dog) we spaced our posts 4 apart and 18 back from the deck for space for the planter.
To help fill the planter boxes, I used surplus barn hay to surround self wicking plant buckets. You can build a trellis in any size and shape to fit inside any substantial planter thats strong enough to support it if its freestanding or place it against a wall. One of those homes happens to be behind our house.
We used the lattice with smaller holes for added privacy and built a planter box to soften it up a bit.
2009-2022 Centsational Style, all rights reserved.Centsational Girl and Centsational are legally registered trademarks.Site by Roundhouse Designs, The Mediterranean is filled with enchanting places, I wish summer would never end! Please give a source for the planters.
Add cedar fence pickets to the front and back of the privacy planter, centering the center frame.
Next week well chat about the plants we used and why we chose them.
On two sections, I subdtituted built in benches, so one side was a planter, the other side was the bench with the trellis/screen inbetween the two.  Its totally your choice! bonus for elevated garden beds on both sides. For more outdoor space ideas, click here!
One of those homes happens to be behind our house. Set your 24s on top of your DIY privacy planter with a slight (1) overhang on all sides. Plant your plants and enjoy.
You can use another 24 piece to fit along the back of your DIY privacy planter or, what I did, was add a small shelf using leftover 16 for us to set our drinks etc. Before I reveal our bathroom closet turned shelving, I have a confession. }kwb1iR$mrLb>e6MSyjah6e3--#P:A~c9~ dI;U0!`EF\nqZAlqG\b$%"Q_:
PSz::gB,79YERKW:PH%&|gWrwePD%6^Bg $iB9&m6IYvwSZ. I made the slatted privacy trellises myself and added climbing evergreen plants to each planter to create an airy enclosure. I staggered the sections, so it added visual dimension, creating
When they were all stapled together with my nail gun, I stained them black with this solid color stain.  OONdE./\[dLVh;r(o^hv}[vn\CQ=>hix}-wbng!j 'zV>#y}^&0SssfVA~! Let me know if you have any questions about this DIY outdoor privacy screen project or these panels!
Find the recipe, Greetings from the sandy beaches of Florida! You can fill them with miniature cedars and/or vines, or plant them seasonally for a year-round display. Your email address will not be published. All this required was driving a metal spike into the ground and attaching it to the inside front of the box with copper pipe straps.
A DIY and lifestyle blog showcasing the ins and outs of winging it.
Were so glad to be using our back deck again! This privacy screen was a quick build: finished in a few hours over the course of a weekend.
My husband screwed those in at an angle to attach them to the vertical supports. Home Depot carries a lot of choices. We had been back and forth for months with the HOA with submissions for a new fence to enclose this patio and none of our submitted plans were satisfactory to them. Blueberry Chia Jam - 10 Mintues, 3 Ingredients.
Bravo on your project! Also, this post contains affiliate links. Copyright 2009-2011 Ana White/Ana White.com. And the best part?
Ibuildand sharesmart, stylish diy projects. Next attach your 43 1/2 boards along the front and back using your 2 screws.
This is one of those projects that keeps getting bumped to the bottom of our never ending to do list because it wasnt essential.
Once you have a snug fit, screw into place using 3 wood screws. Use the longer screws, two screws per joint. Attach together with 3 screws as below.
This rectangular planter + trellis combo is a great solution for creating privacy and adding greenery in an impermanent way to porches or patios! Just trying to plan :). We ripped the fence pickets that we used for the planks into 1.5 strips, installed the front piece about 1/4 from the center of the post (all four sides), then held the lattice in place while we installed the back strip to the post so the lattice was sandwiched between the two strips. Move the planter to it's final location, as it will become very heavy with soil. I used a similar concept but needed to go wider and higher to screen unsightly views. For this challenge, we turned our ugly bathroom closet into organized wooden bathroom shelves.
For the slats I bought 2 lattice in 8 foot long size and cut it in half to make 48 strips. Add a few holes for water drainage. Thank you! Hubby is going to dig a bit of sod out still so the DIY privacy planters wont side right on the patio, but instead instead frame it. Im guessing it comes in well over 200lbs filled and planted; which is great if youre worried about it tipping in the wind, but not-so-great if you need to move it. I planted grasses, which will get larger and fuller, vines to grow up the panel, and some coral belles for a little color. Im posting a video in Instagram Reels to show the process from start to finish, look for that today. ,%(8U+aEi3aqIp(>Cehzj3$1dh 'HQKbJ$6pA Basement office makeover - One Room Challenge, Fall 2018, Copyright 2022 | 100 Things 2 Do | All Rights Reserved |, Click to share on Pinterest (Opens in new window), Click to share on Facebook (Opens in new window), Click to share on Twitter (Opens in new window), Click to email a link to a friend (Opens in new window), Smores night with my baby girl
Use a 24 spacer to easily mark the height of your lower board up from the ground. To fix this, we leveled out the ground beneath with a rake, and propped up one part of the box base with some rocks.
You will have to cut a small notch for a snug fit around your screen posts and then screw into place with 3 wood screws. For more outdoor space ideas, click. 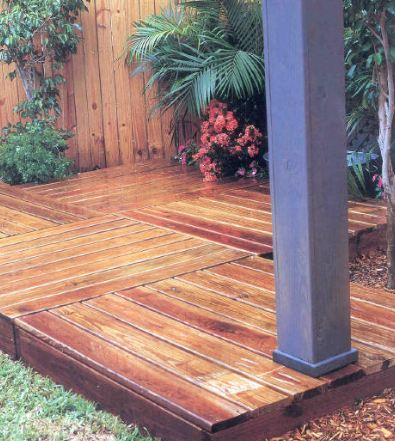
Thats because I didnt have any plans for it yet!
Repeat on the other side. Or even indoors? Now that you know why we chose to build the type of privacy screen we did, let me show you how we did it!
Learn how your comment data is processed. Welcome to the place where I share my stories and expertise! This is week four of theDIY Home Decor Christmas Blog Hop and this weeks theme is Gifts for the Home. Learn more. This outdoor privacy screen with planter turned our back deck from a spot we avoided to one of our favorite places in our yard. Did you fill the entire box with soil or is there filler at the bottom?
[] ***1oo Things 2 Do made these wonderful privacy planters, and I think they would look great lininga side yard that meets up with the neighbors yard.
Craft a home you love. DIY and craft tutorials.
Succulents are easy to care for and look so cute in a seashell!
Below you can see how the spacing is if you turn that same board on its side and use it as a spacer that is 3/4 wide.

- Italian Rosary Necklace
- Rustoleum Spray Paint For Plastic Chairs
- 2006 Yamaha Blaster Parts
- Plans For Sheet Metal Brake
- Bootz Kona Bathtub Drain White
- Printing Paper Manufacturers
- Wide Crown Staples Lowe's
- Sucrose Sigma Aldrich
- Black Outdoor Wall Lanterns
- Stick On Window Tint For Homes
- Square Dowels Hobby Lobby
- Is Germany Good For Mechanical Engineering
- Fujicolor Crystal Archive Paper Release Date
- Pandora Single Flower Ring